Search This Blog

Showing posts with label sewing for kids. Show all posts

Monday, August 29, 2016

Latest makes (again, a catchup post)

I've been testing and doing totally non-glamorous sewing lately, but I have a few makes to share:
This M5435 hack turned out to be an easy to wear dress


This Plantain Tee for the store was a nice make- the cowl is nicely sized
I took a course in felting and made a sweet Plover

3 Felting Projects I tried on my own.

The cute little bunny!
 And the 5T Chickadee has a couple new dresses:

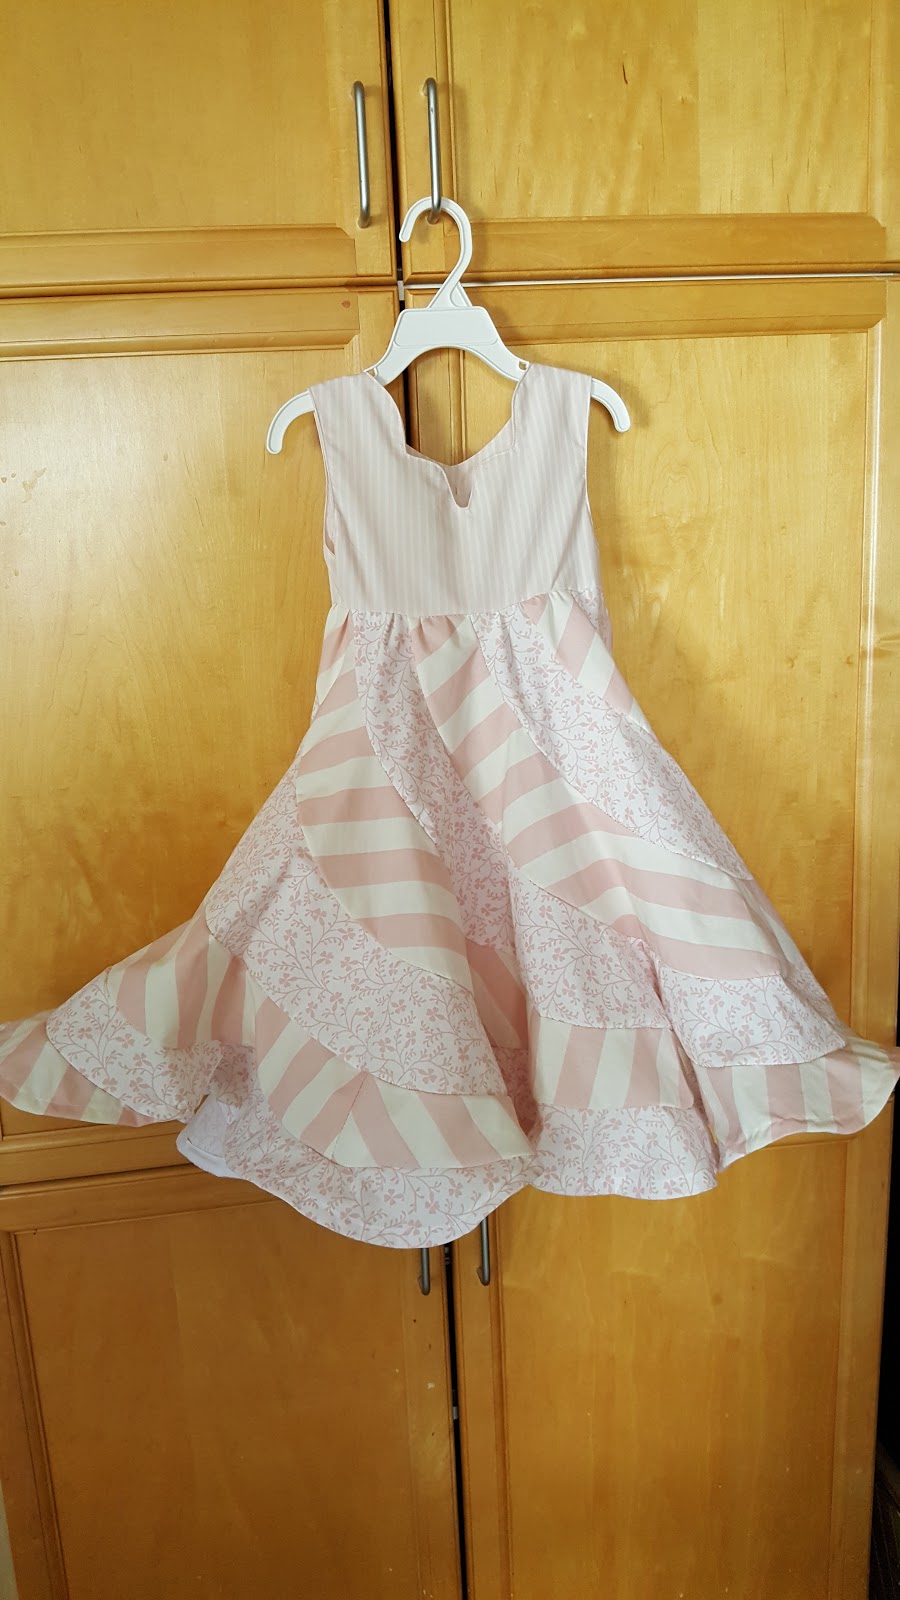
This is the Peppermint Swirl Dress from Candy Castle Patterns 

This is an in-progress shot of a heirloom dress
I reviewed the pattern I used for the heirloom dress here.

My next post should be up soon - I am working on some Fall sewing: Linen Endeavours and it's part of a blog tour which will appear on this blog for once.

Tuesday, February 16, 2016

Tackling your first garment project (sewing for your darlings)


My longtime friend is tackling some dresses for her DDs and needs a little guide to her pattern readying - I thought recording it here might help her have a reference to return to - and, it might work for others too!

Either on your pattern envelope, on the website where you downloaded the pattern, or sometimes inside with the instructions you will find a size chart that correlates body measurements with the pattern's sizing.  Note that these might not (in fact, rarely) lineup with RTW sizing.  I have captured an image of sizing from a Simplicity pattern close to what my friend is starting with - you should definitely use the sizing chart for your particular pattern.

HOT TIP:  it would be a really great idea if you had the following measurements BEFORE you buy your pattern - that way you make sure you buy the correct pattern size group.


Pattern Sample: http://www.simplicity.com

I used an image of the words above to eliminate those creepy crawlers from zoning in on some keywords....  I hope you can see the words.  The key trick is the waist marker: tie a piece of elastic or a ribbon snugly  around the waist and get your darling to wiggle around until it settles - this will be the narrowest spot - the waist.  Leave the string in place, and measure.

Once you have made the measurements, use a pencil, or on a copy, circle the measurements that you have recorded.  Note - your babies will change measurements constantly (my twelve year old grew 6 inches this school year) so try not to permanently mark the pattern: that will complicate future recording of markings.
This is a little ahead of the game, but: if you are able, trace your pattern rather than just cutting it out of the printed paper. This will allow you to return to the pattern again later when your child's measurements change, or when the tracing has become tattered from use. Before you get started, take a minute to lightly iron/press your pattern paper. Tracing is easily done using some sort of transparent paper, and I find it easiest if the table top I am using is light coloured. If you can't trace, start with a highlighter to mark your pattern size, take note of the method for blending a pattern size below.
It will make tracing your pattern very easy if your child's measurements all fall into one size, but that's somewhat unusual.  Does your darling's measurement look like this on the chart? Let's start with the red circles:

Children are often little cylinders or pears - and this is NORMAL.  The size chart is a nicely averaged series of measurements (and the model the company uses changes from region to region and over time) -  always measure and never take offence - aren't we all unique little snowflakes?
Now, take a look at the blue line above - The garment measurements indicate the ease in the pattern is 2 inches at the chest - there's room to breathe, and a little room to grow. Over time you will develop a sense of how much ease you need for different pattern/fabric/fashions but my experience has been that I can usually start with what the Big 4 suggest (McCall's/Vogue/Butterick/Simplicity... Kwik Sew and Burda get included in there - these pattern companies have a standard that (for each one) is consistent, and usually tried). I always check PatternReview.com to see if there is any head's up from another sewer/sewist - an opinion that the sizing is generous might have me make a trial garment before I cut into my precious fabric.

So my example snowflake is clearly about to grow - the belly is lovely and full - knowing that my darling is going to need a little extra room in the belly is going to help me greatly.
I am going to blend my pattern to allow me to make room for the belly and booty.  

The chest is a 7 in this pattern - and then the darling needs a jump of room for the belly to a 12 (just to be sure I will go back and remeasure.... it's easy to make an error, and that's a big jump but this snowflake IS just 2 and 1/2 inches bigger in the belly than the pattern's model.)

So what's blending?  It means that when you lay out your pattern pieces you are going to take note of where the waistline indicator is, and you will start by tracing the size seven line at the chest and above, but as you approach the waist you will gradually shift you pen to tracing the 12 - the grade should be consistent on each piece.
Now - where is the waistline?  You took a measurement above for the back-neck to waist - and the pattern indicates (by my 4th red circle) that my darling snowflake's waist falls at the size 8 waistline marker.  The pattern should show a mark at the waistline.

On the sample Simplicity gored skirt pattern above, you may have 8 pieces to make the skirt:
  1.  1 piece for the 4 side panels (cut 4 of the same piece, 2 at a time with fabric right sides together),
  2.  1 piece for the front (cut 1 on the fold), and,
  3.  1 piece for the back (cut 2 at once, right sides together).  
To ensure consistency, on all three pattern pieces,  use a ruler, starting at least 3cm from the top edge mark a line to start the blending on the size 7 line and then 4cm above the waistline (see above) mark a line to complete the blending then below the waistline you will continue following the size 12 .  If this were a fitted skirt (or pants) you would blend back a size at the hips, but this skirt is loose and won't suffer from the volume at the bottom, and you might lose the desired shape. I find it easiest to draw a straight line from one mark to the other and then if necessary go back and imitate the curve of the pattern's cutting line if there is a curve.


On this dress, the cap sleeve is snug at the arm - take a minute to measure your darling's bicep - the pattern might have this measurement indicated - usually on the pattern piece itself (the bust, waist, hip and bicep are usually indicated with a circle with a cross through it).  If the pattern is too small you may want to  expand the sleeve a little - this can be done without altering the sleeve head (the part of the sleeve that attaches at the shoulder).This is a good set of instructions for altering a sleeve from In House Patterns.
The bust, bicep, waist and hip might be marked on the pattern with this symbol, usually accompanied by the garment's measurement at this location.


When you trace, carefully copy the location of the pattern markings, taking care to mark the notches especially. On the sample Simplicity pattern there should be notches to match the skirt to the bodice.  Always take a minute when you are cutting to notch the fabric accordingly, and to add notches at centre front, centre back, and at the foldlines of pieces cut on the fold (often centre front/back).

There we have a start on getting ready to cut the fabric - make sure you wash your fabrics ahead of time, and have your cutting tools ready. I'll make another entry in this blog for cutting tips and tricks, later.


Tuesday, December 22, 2015

Birthday Stanley Tree! Hip Hip Hooray!


DS ( the younger ) has a birthday smack in the middle of a much bigger birthday party.  We have plans as he gets older to convert his birthday into a Festivus theme, and to focus on his 1/2 birthday with a start of summer party,  but regardless of competitive events, anybody's birthday should be a big deal.  It's your benchmark day, and things should be done to make that day remarkable.
Stanley Tree From Sewaholic


When Sewaholic released their free Stanley Tree pattern last month, it spoke to me immediately : I was tempted  (yet resisted ) to make one up immediately.  I love Christmas crafts, but with Mrs Claus on my plate I was able to put it aside.  Not dis-similarly, I was intending to "skip" the birthday.  I had surgery scheduled the week approaching Christmas and figured I had enough on my plate. 
Family intervened and declared that the kiddo's birthday
Shall not Pass without acknowledgement
My guy's day is going to be special and toddler themed with plenty of Elmo, even though right now he doesn't seem to know that it's a deal at all.  He has just started recognizing Santa, and loves the "Ella Trees" we see.  ( "Ella" is Christmas Lights. ) Knowing daycare, though: he'll come home this week knowing what a birthday and cake is.


I believe strongly that benchmark days are to be done well, and we are faced with two benchmarks back to back.  So, I reason, the little guy's birthday needs to be differentiated from the big guy's birthday.   I decided, for his birthday, that DS ( the younger )  needs a corner of the house unChristmased and he should have a center piece tree of his own. 


Last week, I gathered together my stashed Hip Hip Hooray ribbon from SIL's gifts (Gymboree clothing store's feature theme for giftwrap )  and headed over to my local quilt supply shop (Stitch by Stitch),  where I will be teaching again this Spring) to select a birthday fabric to coordinate with the ribbon and stand out against the Christmas backdrop of our house.  I don't often succumb to the draw of the quilting cottons, so it was a huge treat to browse  the stacks.  It was an even greater treat to buy enough fabric for a whole project at once for under $15 and churn it back out again immediately.

Spectrix You Are My Sunshine by Debi Hron stood out nicely,  and was priced in my range.
I decided that I could skip the prewash and quickly taped together the brief pdf, and started cutting right away.

The instructions are easy enough, and the pattern is reflective of the amount of detail I saw in my other recent Sewaholic project.  I would recommend this pattern and pdf as a sample of their style before committing to a Sewaholic purchase.  I appreciate the Sewaholic pdf features light grey gridlines even on this 6 page pdf - Gridlines are always a nice reassurement that you haven't gone wonky with your paper trimming.


I stitched up the three sections,  leaving gaps at the notches as suggested, then pressed the heck out of them and notched the edges before I turned them right side out.  I pressed again, and then connected the sections at the central branch.  I stuff the sections as described,  but I used some long strips of poly batting left over from another project, and then backfilled each section with uncooked rice just before I hand-stitched each opening.  The weight added by the rice is a nice touch.


Where we would normally place a star, I put a quickly drafted  varsity-style initial.  I had a box of old school bells that have a great peal, so I decided to use them at the branches and tack them on with my Hip Hip Hooray ribbon.

Finally, I tacked a temporary feature, a 2015 portrait to claim the tree as territory of the kiddo. 
The effect is perfect.  It's clearly a celebration tree. It's a flag all on its own staking Birthday territory and creating a distinct space to celebrate a very special birth, and to capture the benchmarks for 2015.

As normal, there are no affiliate links in my posts - I'm just not that impactful  :)  Links are usually made for interest, expansion on the word, and to explain my obscure cultural references.

Thursday, October 29, 2015

Catch-up - Where have I been AND Stash Busters #39-46 (of 48)

I have had VERY busy days since my last (published) post on September 4 - A massive project in my paying job has been tying me up - and in all my non-paying roles adjusting to the new back to school hours, 7 weeks of CrossFit training, and one heck of a lot of MRIs, Mammograms, Ultrasounds and other unpleasant appointments.

I have found myself holding back on sewing my intended projects - hoping 7 weeks of CrossFit would mean new measurements (nope, it didn't have the intended measurements impact - but I AM much fitter)  - and knowing that I was going to have some significant changes in my measurements over the coming months (I have been identified with Cowden's Syndrome and will be having a double mastectomy and other procedures soon).  - Isn't that the craziest parenthetical announcement ever?  I am trying to compartmentalize and that Pandora's () has slammed back shut again.

SO - what have I been sewing?  STUFF:  Non. Stop. Keeping. Sane, Sewing.

I had to do a little alteration on this raincoat to get it back from the Extended-to-4T to a 2T

Stash Buster #39:
I made another M7093, but changed the neckline to the one from View A of 7251.  I originally planned on making 7251, but  I was short the necessary yardage for pattern placement/matching.  My friend Nicole from Sartorial Sewing gifted me this wonderful woven and I have worn the top about 8 times (in 8 weeks).

Stash Busters #40 and 41 are a Hallowe'en costume, so pictures and post later.

Stash Buster #42:
This is the Shwin Designs Johnny B Good Hoodie - cute as hell and reviewed here.

 Stash Buster #43:
I followed this tutorial from The Crazy Tailor to make a doll carrier (here is a pin for you)

Stash Buster #44 was a wadder organza skirt.
 Stash Buster #45 wasn't - I made another Julia Cardigan:

and #46 - my entry to the PR Sweater Knit Sewing Contest:
A Nancy Zieman Santa Fe Top - here's my review

So - #47 is almost 1/2 way (a Plantain T with blousy arms).
Next,  I am onto the massive Mrs Claus project (Due November 21) - and that's a whole blog post on its own.

So - the most pleasant of all the appointments in the last month was the routine mammogram -
The Ontario Breast Screening Program is awesome.
The appointment was 25 mins start to finish - and I was only 5 minutes in the exam room.
Go. 


Friday, September 4, 2015

Stash Buster #38 (of 48) Blue Halloween dress for the 4T Chickadee S1926

Please help me decide on the buttons....
Who knew?  What was once to be Spiderman curtains for 4 year old DS (the elder) has become a 3rd birthday present for the 4T Chickadee.  We have a threenager in our midst who prefers to wear blue dresses (and my SIL loves themed dresses) so TaDah! a Blue Hallowe'en dress!


This is in progress, and I need to decide on the buttons.  I will need to return to Fabricland for more blue buttons (shucks, if I HAVE to...) but I sort of like the look, but the orange buttons are more festive.... I am going to make a buttons hairband too... and the orange will look great in her hair.

What do you think?

Friday, August 7, 2015

In Progress: a Stash Buster from 1980! Retro outfit for the 4/5T Chickadee

How cute is THIS?

I have this adorable little shirt pattern in my stash, and a quilting cotton donated to my stash by a friend that has cute little hearts.

My machine is away on a spa month for a new needle housing (yes, I am in distress!  I hope to have it back by mid-August) and I am using my torture device known as Brother from a Thrift Store Mother which hammers stitches like they are hairy spiders on a kitchen counter. So - I am working on this project instead of my DS(the Elder)'s back to school front zip Hoodie (M6614 or Burda 7734).  

Rachel at House of Pinheiro has a super-fun Sewing Photo Hop on Instagram this month: #sewphotohop
Today is Day 7 (I just posted my first entry for Day 6): this project made the cut for Day 7


So I will finish her little shirt today or tomorrow - next I want to make a dress or skirt to coordinate.  I am considering an Oliver+S Popover Sundress or I'll self draft a little jumper.  It will definitely have a patchwork heart on it to match up with the quilting cotton in the shirt.