Search This Blog

Showing posts with label Tutorial. Show all posts

Tuesday, June 21, 2016

Look what I did to my Florence!

The Mumu/Maxi/Sundress theme in Sewing Land has taken a definite hold this summer, and I debated jumping onboard - until my SIL's announcement that her annual Heat of July BBQ was themed "Hippie".  In previous years I have worn Hawaiian, Hillbilly and White Trash outfits, so I succumbed to the pressure and started thinking about how to manage a sundress.

Remember the cute little dresses we wore as kids in the 70s?  The Smocked and Shirred dresses with the little ties that we pulled up WAY high in the front so our 7 year old boobies wouldn't peek out? - Well, I popped into Fabricland and found their rolls of Shirred fabric and bought enough to make a lazy, simple summer dress.

In typical Heather-fashion I started overthinking the dress (I was thinking I would make a built-in bra using the Fairy Bra Mother's Craftsy course) and had a stroke of brilliance! 
What if I used the Seamwork Florence?
use the Seamwork link above, signup for the 1 month trial and choose the Florence and one other pattern for $3 - that's an affiliate link; you (as one of my 6 followers) may eventually be a partial contributor to paying for 1 month of my ongoing subscription.

So I hacked (it hardly justifies the term) the Florence Bra!

Interior shot showing the direction of shirring on the inner cups, the secondary bridge lining and the unshirred fabric on the outer cups.  I serged the lining to the side seam.
  1. I eliminated the back seam and added side seams (I wanted to have side slits for walking comfort, and knew that the easiest way was to hem back the side seams below the knee).  To do this I cut the back off where the side seam should lay, and added seam allowance to the side seam, then edited the center seam and cut the back on the fold.
  2. Using the new front piece of the bra bridge, I cut a knit lining fabric for bridge support (I have done this to my previous Florence Bras and recently did this in my Closet Case Swimsuit).
  3. I cut the front and back with the upper edge on the shirred edge (cutting the cups out of the shirring.  I checked to make sure that the shirring elastic was secured before I snipped.
  4. I cut the inner cup on the shirred edge of the fabric.
  5. I cut 4 of the outer cup in regular fabric (for support - I would have had too much bounce with shirred fabric on both halves of the cup).
  6. I hemmed the fabric and hemmed back the side slits.
  7. I finished the neckline edge of the cups with some picot elastic from my scraps.
  8. I added a little bow for humor.

Gratutious shot of the picot edged elastic; sewn using the lingerie method of zigzagging wrong side down to the right side of the cup and folding back and 3-step zigzagging on the right side to cover the elastic edge.


Voila!  I have a sexy, summery,supportive sundress to wear without an underbra (and the multiple straps) - and it worked really well on my curviness!

Tuesday, February 16, 2016

Tackling your first garment project (sewing for your darlings)


My longtime friend is tackling some dresses for her DDs and needs a little guide to her pattern readying - I thought recording it here might help her have a reference to return to - and, it might work for others too!

Either on your pattern envelope, on the website where you downloaded the pattern, or sometimes inside with the instructions you will find a size chart that correlates body measurements with the pattern's sizing.  Note that these might not (in fact, rarely) lineup with RTW sizing.  I have captured an image of sizing from a Simplicity pattern close to what my friend is starting with - you should definitely use the sizing chart for your particular pattern.

HOT TIP:  it would be a really great idea if you had the following measurements BEFORE you buy your pattern - that way you make sure you buy the correct pattern size group.


Pattern Sample: http://www.simplicity.com

I used an image of the words above to eliminate those creepy crawlers from zoning in on some keywords....  I hope you can see the words.  The key trick is the waist marker: tie a piece of elastic or a ribbon snugly  around the waist and get your darling to wiggle around until it settles - this will be the narrowest spot - the waist.  Leave the string in place, and measure.

Once you have made the measurements, use a pencil, or on a copy, circle the measurements that you have recorded.  Note - your babies will change measurements constantly (my twelve year old grew 6 inches this school year) so try not to permanently mark the pattern: that will complicate future recording of markings.
This is a little ahead of the game, but: if you are able, trace your pattern rather than just cutting it out of the printed paper. This will allow you to return to the pattern again later when your child's measurements change, or when the tracing has become tattered from use. Before you get started, take a minute to lightly iron/press your pattern paper. Tracing is easily done using some sort of transparent paper, and I find it easiest if the table top I am using is light coloured. If you can't trace, start with a highlighter to mark your pattern size, take note of the method for blending a pattern size below.
It will make tracing your pattern very easy if your child's measurements all fall into one size, but that's somewhat unusual.  Does your darling's measurement look like this on the chart? Let's start with the red circles:

Children are often little cylinders or pears - and this is NORMAL.  The size chart is a nicely averaged series of measurements (and the model the company uses changes from region to region and over time) -  always measure and never take offence - aren't we all unique little snowflakes?
Now, take a look at the blue line above - The garment measurements indicate the ease in the pattern is 2 inches at the chest - there's room to breathe, and a little room to grow. Over time you will develop a sense of how much ease you need for different pattern/fabric/fashions but my experience has been that I can usually start with what the Big 4 suggest (McCall's/Vogue/Butterick/Simplicity... Kwik Sew and Burda get included in there - these pattern companies have a standard that (for each one) is consistent, and usually tried). I always check PatternReview.com to see if there is any head's up from another sewer/sewist - an opinion that the sizing is generous might have me make a trial garment before I cut into my precious fabric.

So my example snowflake is clearly about to grow - the belly is lovely and full - knowing that my darling is going to need a little extra room in the belly is going to help me greatly.
I am going to blend my pattern to allow me to make room for the belly and booty.  

The chest is a 7 in this pattern - and then the darling needs a jump of room for the belly to a 12 (just to be sure I will go back and remeasure.... it's easy to make an error, and that's a big jump but this snowflake IS just 2 and 1/2 inches bigger in the belly than the pattern's model.)

So what's blending?  It means that when you lay out your pattern pieces you are going to take note of where the waistline indicator is, and you will start by tracing the size seven line at the chest and above, but as you approach the waist you will gradually shift you pen to tracing the 12 - the grade should be consistent on each piece.
Now - where is the waistline?  You took a measurement above for the back-neck to waist - and the pattern indicates (by my 4th red circle) that my darling snowflake's waist falls at the size 8 waistline marker.  The pattern should show a mark at the waistline.

On the sample Simplicity gored skirt pattern above, you may have 8 pieces to make the skirt:
  1.  1 piece for the 4 side panels (cut 4 of the same piece, 2 at a time with fabric right sides together),
  2.  1 piece for the front (cut 1 on the fold), and,
  3.  1 piece for the back (cut 2 at once, right sides together).  
To ensure consistency, on all three pattern pieces,  use a ruler, starting at least 3cm from the top edge mark a line to start the blending on the size 7 line and then 4cm above the waistline (see above) mark a line to complete the blending then below the waistline you will continue following the size 12 .  If this were a fitted skirt (or pants) you would blend back a size at the hips, but this skirt is loose and won't suffer from the volume at the bottom, and you might lose the desired shape. I find it easiest to draw a straight line from one mark to the other and then if necessary go back and imitate the curve of the pattern's cutting line if there is a curve.


On this dress, the cap sleeve is snug at the arm - take a minute to measure your darling's bicep - the pattern might have this measurement indicated - usually on the pattern piece itself (the bust, waist, hip and bicep are usually indicated with a circle with a cross through it).  If the pattern is too small you may want to  expand the sleeve a little - this can be done without altering the sleeve head (the part of the sleeve that attaches at the shoulder).This is a good set of instructions for altering a sleeve from In House Patterns.
The bust, bicep, waist and hip might be marked on the pattern with this symbol, usually accompanied by the garment's measurement at this location.


When you trace, carefully copy the location of the pattern markings, taking care to mark the notches especially. On the sample Simplicity pattern there should be notches to match the skirt to the bodice.  Always take a minute when you are cutting to notch the fabric accordingly, and to add notches at centre front, centre back, and at the foldlines of pieces cut on the fold (often centre front/back).

There we have a start on getting ready to cut the fabric - make sure you wash your fabrics ahead of time, and have your cutting tools ready. I'll make another entry in this blog for cutting tips and tricks, later.


Tuesday, December 22, 2015

Birthday Stanley Tree! Hip Hip Hooray!


DS ( the younger ) has a birthday smack in the middle of a much bigger birthday party.  We have plans as he gets older to convert his birthday into a Festivus theme, and to focus on his 1/2 birthday with a start of summer party,  but regardless of competitive events, anybody's birthday should be a big deal.  It's your benchmark day, and things should be done to make that day remarkable.
Stanley Tree From Sewaholic


When Sewaholic released their free Stanley Tree pattern last month, it spoke to me immediately : I was tempted  (yet resisted ) to make one up immediately.  I love Christmas crafts, but with Mrs Claus on my plate I was able to put it aside.  Not dis-similarly, I was intending to "skip" the birthday.  I had surgery scheduled the week approaching Christmas and figured I had enough on my plate. 
Family intervened and declared that the kiddo's birthday
Shall not Pass without acknowledgement
My guy's day is going to be special and toddler themed with plenty of Elmo, even though right now he doesn't seem to know that it's a deal at all.  He has just started recognizing Santa, and loves the "Ella Trees" we see.  ( "Ella" is Christmas Lights. ) Knowing daycare, though: he'll come home this week knowing what a birthday and cake is.


I believe strongly that benchmark days are to be done well, and we are faced with two benchmarks back to back.  So, I reason, the little guy's birthday needs to be differentiated from the big guy's birthday.   I decided, for his birthday, that DS ( the younger )  needs a corner of the house unChristmased and he should have a center piece tree of his own. 


Last week, I gathered together my stashed Hip Hip Hooray ribbon from SIL's gifts (Gymboree clothing store's feature theme for giftwrap )  and headed over to my local quilt supply shop (Stitch by Stitch),  where I will be teaching again this Spring) to select a birthday fabric to coordinate with the ribbon and stand out against the Christmas backdrop of our house.  I don't often succumb to the draw of the quilting cottons, so it was a huge treat to browse  the stacks.  It was an even greater treat to buy enough fabric for a whole project at once for under $15 and churn it back out again immediately.

Spectrix You Are My Sunshine by Debi Hron stood out nicely,  and was priced in my range.
I decided that I could skip the prewash and quickly taped together the brief pdf, and started cutting right away.

The instructions are easy enough, and the pattern is reflective of the amount of detail I saw in my other recent Sewaholic project.  I would recommend this pattern and pdf as a sample of their style before committing to a Sewaholic purchase.  I appreciate the Sewaholic pdf features light grey gridlines even on this 6 page pdf - Gridlines are always a nice reassurement that you haven't gone wonky with your paper trimming.


I stitched up the three sections,  leaving gaps at the notches as suggested, then pressed the heck out of them and notched the edges before I turned them right side out.  I pressed again, and then connected the sections at the central branch.  I stuff the sections as described,  but I used some long strips of poly batting left over from another project, and then backfilled each section with uncooked rice just before I hand-stitched each opening.  The weight added by the rice is a nice touch.


Where we would normally place a star, I put a quickly drafted  varsity-style initial.  I had a box of old school bells that have a great peal, so I decided to use them at the branches and tack them on with my Hip Hip Hooray ribbon.

Finally, I tacked a temporary feature, a 2015 portrait to claim the tree as territory of the kiddo. 
The effect is perfect.  It's clearly a celebration tree. It's a flag all on its own staking Birthday territory and creating a distinct space to celebrate a very special birth, and to capture the benchmarks for 2015.

As normal, there are no affiliate links in my posts - I'm just not that impactful  :)  Links are usually made for interest, expansion on the word, and to explain my obscure cultural references.

Thursday, October 29, 2015

Catch-up - Where have I been AND Stash Busters #39-46 (of 48)

I have had VERY busy days since my last (published) post on September 4 - A massive project in my paying job has been tying me up - and in all my non-paying roles adjusting to the new back to school hours, 7 weeks of CrossFit training, and one heck of a lot of MRIs, Mammograms, Ultrasounds and other unpleasant appointments.

I have found myself holding back on sewing my intended projects - hoping 7 weeks of CrossFit would mean new measurements (nope, it didn't have the intended measurements impact - but I AM much fitter)  - and knowing that I was going to have some significant changes in my measurements over the coming months (I have been identified with Cowden's Syndrome and will be having a double mastectomy and other procedures soon).  - Isn't that the craziest parenthetical announcement ever?  I am trying to compartmentalize and that Pandora's () has slammed back shut again.

SO - what have I been sewing?  STUFF:  Non. Stop. Keeping. Sane, Sewing.

I had to do a little alteration on this raincoat to get it back from the Extended-to-4T to a 2T

Stash Buster #39:
I made another M7093, but changed the neckline to the one from View A of 7251.  I originally planned on making 7251, but  I was short the necessary yardage for pattern placement/matching.  My friend Nicole from Sartorial Sewing gifted me this wonderful woven and I have worn the top about 8 times (in 8 weeks).

Stash Busters #40 and 41 are a Hallowe'en costume, so pictures and post later.

Stash Buster #42:
This is the Shwin Designs Johnny B Good Hoodie - cute as hell and reviewed here.

 Stash Buster #43:
I followed this tutorial from The Crazy Tailor to make a doll carrier (here is a pin for you)

Stash Buster #44 was a wadder organza skirt.
 Stash Buster #45 wasn't - I made another Julia Cardigan:

and #46 - my entry to the PR Sweater Knit Sewing Contest:
A Nancy Zieman Santa Fe Top - here's my review

So - #47 is almost 1/2 way (a Plantain T with blousy arms).
Next,  I am onto the massive Mrs Claus project (Due November 21) - and that's a whole blog post on its own.

So - the most pleasant of all the appointments in the last month was the routine mammogram -
The Ontario Breast Screening Program is awesome.
The appointment was 25 mins start to finish - and I was only 5 minutes in the exam room.
Go. 


Thursday, April 2, 2015

Butterick Lisette Moto Jacket B6169 - a very happy project

I feel like I have been working on the moto jacket all month, but in reality I only cut it out last week.  Unlike my usual routine of buy for stash and work from stash, I fully planned this jacket:
  1. Ordered the pattern from PatternReview.com Feb 19
  2. Committed to the Sewalong  March 6
  3. Stumbled on the fabric and received assistance with the zipper at Giroux Sewing Centre while travelling  March 14
  4. Traced the Pattern March 18
  5. Made Muslins March 20-22
  6. Sewalong started March 23
  7. Finished Jacket took pictures March 30-31
  8. Blogged April 2

I am thrilled with the result,  and looking forward to wearing it.
Liesl had a few "extra credit" steps in her sewalong and I followed these, although my hem interfacing was too light to be effective, and I snipped the upper back underlining to release the fabric at one shoulder.  I found the issue too late to figure out what went wrong - I am not going to unbag the lining to investigate.
I think the nicest hidden feature was a crazy back facing process:
  the sewalong had a really intimidating image of gathering an pins (I dislike pinning my sewing)
But it turned out gorgeous!


Overall - I give this project a 10/10 for satisfaction.

Update:  here are some more photos as requested:


Monday, March 16, 2015

Stash Buster #18 (of 48) : Birthday Raincoat for the soon to be 2 nephew - PUL - Burda 9458

A year ago I made a sweet raincoat for the (then) 2T Chickadee:

So let's talk PUL:  
 Polyurethane Laminated Fabric (PUL Fabric) is a fabric  that has been bonded on one side to a layer of polyurethane film.  The fabric is usually polyester, cotton or a blend - the fabric can be vibrantly printed or dyed prior to the bonding.  The bonding is done via heat (laminated).  It is breathable, usually 100% waterproof, durable, flexible (has a nice drape) and is colourfast.  Hospitals were the original customers of the fabric producers, using the fabric for mattress covers.  PUL fabric is widely used in reusable diaper production.
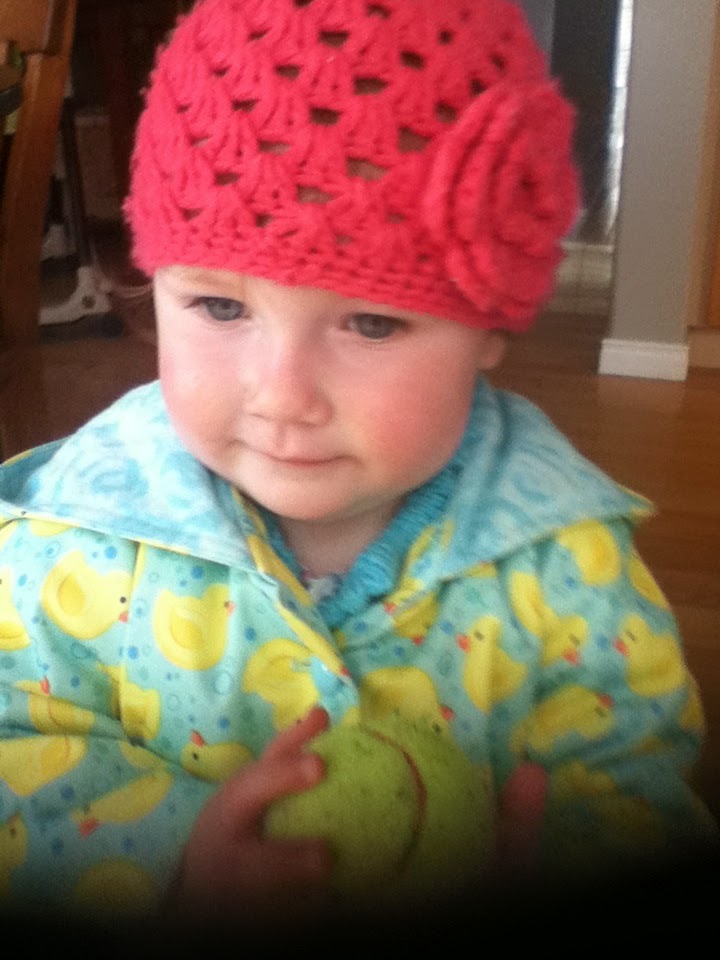
Babyville Boutique PUL rocked the functionality of a raincoat (breathable and waterproof) and a gorgeous flannel lining made it cozy for a wet, Canadian Spring.  The ducks were a favorite, and I made cute little orange rain pants to complement the coat.

So, now the darling nephew is about to turn 2, and I have some other PUL in The Stash:
 

The Chickadee had buttons on her jacket, but for DN I have chosen snaps - Babyville snaps are nice and strong, and color coordinated in the yellow.

The pattern is BurdaKids 9458 - and it is as cute a button.  Here is the link to my pattern review.

 I can't wait to hand it over.
I did a PUL How to - for a bib last year:

I lined the jacket in a cozy flannel, it will be loved, I am sure.


Some final images of the chickadee and her coat:

Meters Used on this projects: 3 - 1.5 of Flannel, 1.5 of PUL
Total Meters Busted 3/16/2015: 26.7


Wednesday, March 11, 2015

The Trials and Tribulations of making a Princess Costume - McCalls 7000 - 3T

In the Summer, I was going to make a pretty dress for my 2T niece for her birthday, and so I went to Fabricland and saw a lineup of women at the cutting table all holding turquoise fabric.  "Weird," I thought, and then I asked one woman if there was a school play.  
The woman actually guffawed at me.
Apparently EVERYONE was sold out of Elsa costumes (whatever that meant). And now I know.
Check out just a few of the insane stats for Anna and Elsa's dresses:

I mentioned some of this in my PatternReview.com entry - but I need to be completely frank - If I were a young mom of a Frozen-obsessed little girl, this pattern might break my heart.

As it is - I am a Grown-Up Parent of a few boys, and a [dare I say it? - Treasured] Auntie of a 3T princess who really likes Frozen - and this pattern tried my patience.
I expect to be using this pattern for a number of years as we work our way through the princesses and sizes, it's an excellent bodice, skirt, yoke combination - If I use a flesh-toned netting on the yoke I have a great strapless look appropriate for a Canadian child, and I only need to vary length and skirt fullness.  I am pleased to own this pattern.

BUT - this was meant to be a Frozen dress - and it's my first Disney Princess (ask me about superheroes, Thomas the Tank Engine, Cars, Star Wars and I got the average mom in hand, but Princesses?  I had to create a Pin Board to get the classics - Belle, Cinderella, Aurora - straight)

So, First:  This pattern package was a giant PIA - the package did not clearly breakdown the yardage needed of all the different colours,  I had to pull out the instructions for the layouts, and be able to recognize the pattern pieces on the layouts to figure out the contrast codes, so that I could use the package to buy the fabric.

Second, I trace my patterns:  There were 5 sheets of tissue in this package - and there were separate pieces for groups of sizes, separate applique patterns for groups of sizes, and three views.  If I were not an experienced sewist it might have overwhelmed me - and imagine - there are a subsection of sewists who face sewing costumes when they are needed (like when a certain princess's dress is sold out at a certain wonderland) - and this might be the only time they tackle apparel sewing until Prom time.
Cue the violins:  It took me 1.5 hours to trace the pieces for this dress.  I almost frankenpatterned this puppy to make it end.  I ask you - how many young moms wept over this pattern?

Third - and now I will stop counting.  I bought my fabric to match the pattern envelope, and to keep my spirits up I played the movie while I traced and cut.  then my subconscious started wailing like a banshee....  something is amiss....  let's review the imagery below:

Look at the sleeves... the shoulders....  are you with me?  There's something different... 
Holy C!  that's not white!  and, There's a shoulder strap on that dirndl!

TGI'm creative!  I grabbed the package, and the picture and found myself at the feet of the 3T princess
 - "is this the right dress you would like me to make?  just like this?  okay mom?" - 

If she were just a little older and more demanding I would have had to alter the pattern, and go buy more fabric - phew!  I will have to do this when I remake this for her in a year or two, but wow, imagine the hailstorm some moms endured when they produced this lovely dress for Hallow'een:


Okay - now:  The dress was a success, but I added some some gold at the bodice edges - just in case:  
Handy-Dandy - the top-stitching meant I didn't have to [shudder] slipstitch the lining into place. [gross - I was pretty sick of this dress by the time I had to slipstitch]

I finished the edges of the appliques with a zigzag stitch - I made a point of buying a resilient polyester suiting to make this dress (the same fabric used for Teflon and bulletproof tablecloths at conference centres) - the appliques are broadcloth - the zigzag should help them fare better in the washer).


If you are planning the dress - don't forget to adjust the applique at centre back - there's a zipper tab to deal with on the smallest size.


The zipper only goes to the top of the bodice (I assume because the zipper will be too visible on either the black or the white and impossible to coordinate) - plan for a good and easy clasp at the neck.


Just for good measure here is a shot of the full back of the dress.


Sunday, March 8, 2015

Not a Stashbuster - Family Reunion Dress #2 - The Store's Version

The 2nd make of the Family Reunion Dress is done and it is as cute as its own button.   Seriously:  I made an oversize button that featured the repeated pattern.

 I used the Tilda All that is Spring (2014) line for this one, as per the wishes of the store where I am teaching the class.  I was so happy that the print was pretty much on grainline (phew!).  Both fabrics had a one direction pattern, so that posed a little bit of a challenge given the tight margin of error in the cutting and shrinking on this 100% (quilting) cotton.  I didn't have to fudge the grain at all to make it fit.
 Once again I am really proud of my finishing.  I bound all of the exposed seams (so that it would be washable again - but the wrinkle factor in this fabric is a little daunting....)


All in all, I am pleased that this one is the one that will be hanging in the store for fondling.